
Main Courses
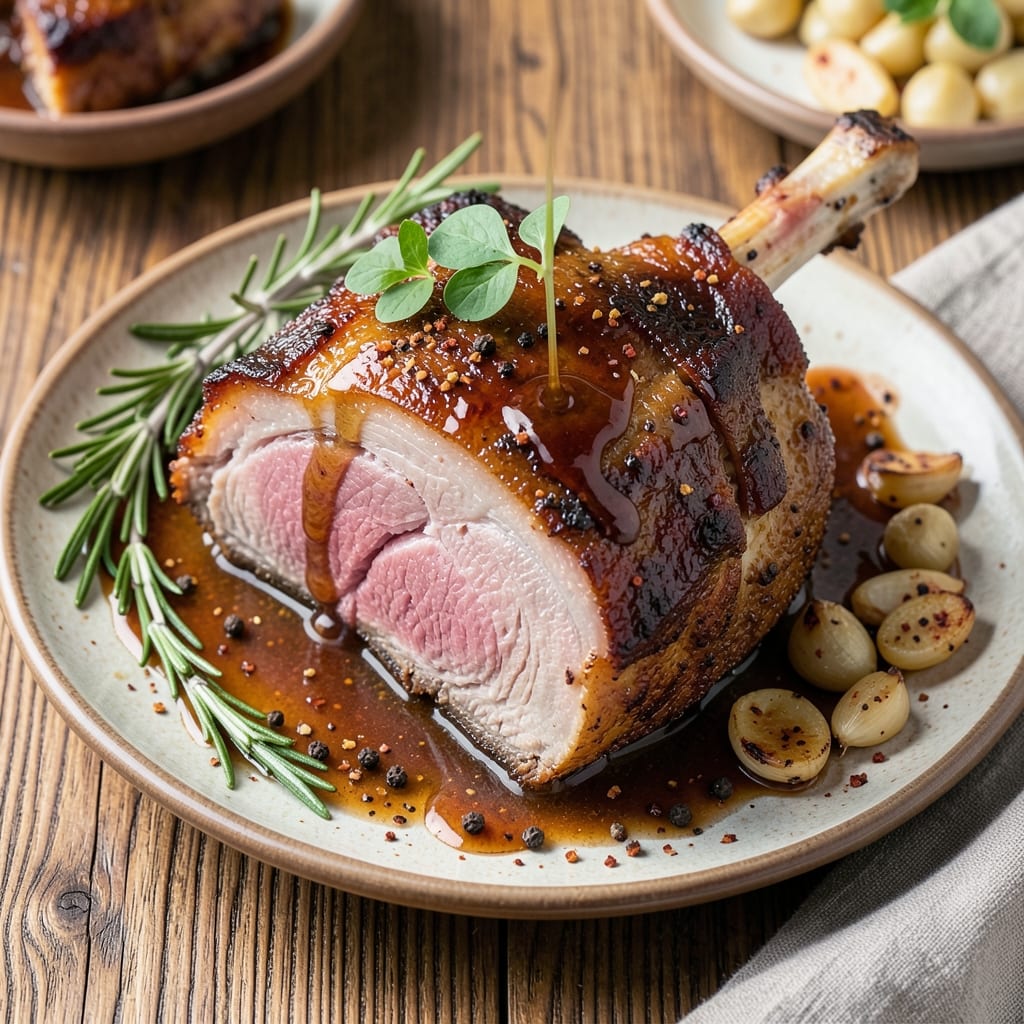
The best ever pork shoulder roast transforms tough cuts into melt-in-your-mouth perfection through a proven slow-braising technique. 🔥 After years of perfecting this method at my restaurant, I’ve cracked the code for restaurant-quality tenderness at home—no fancy equipment required. The secret lies in patience: low heat, proper seasoning, and letting the collagen break down over hours into rich, juicy flavor.
This recipe delivers fall-off-the-bone results by starting with a dry brine (salt the pork 24 hours ahead) and using a simple but potent spice rub. The key is cooking it low and slow—around 275°F for 6-8 hours—until the internal temperature hits 203°F, ensuring every bite is tender. The crust forms naturally as the fat renders, creating a caramelized exterior that adds depth to every flavor.
What you’ll end up with is a pork shoulder so tender it practically shreds with a fork, infused with smoky, savory notes from the rub. The meat stays juicy and flavorful even after resting, making it ideal for sandwiches, tacos, or serving with classic sides like mashed potatoes or apple sauce. This is the kind of dish that turns a simple weeknight dinner into a showstopper.
Best of all, the leftovers reheat beautifully—perfect for meal prep or feeding a crowd. Let’s get started on this foolproof method that’s earned its reputation as the ultimate pork shoulder roast.
Ingredients for best ever pork shoulder roast
Six pounds of pork shoulder plus twelve simple ingredients transform into restaurant-quality melt-in-your-mouth perfection.
| Ingredient | Amount | Notes |
|---|---|---|
| Bone-In Pork Shoulder 🍖 | 6 lb | With fat cap intact, center-cut preferred |
| Kosher Salt 🧂 | ½ cup | Diamond Crystal preferred, for dry brine |
| Black Peppercorns 🌶️ | 2 tbsp | Freshly cracked, coarse grind |
| Smoked Paprika 🌶️ | 2 tbsp | Spanish smoked for authentic flavor |
| Garlic Powder 🧄 | 1 tbsp | Freshly ground preferred |
| Onion Powder 🧅 | 1 tbsp | For balanced depth |
| Ground Mustard 🌿 | 1 tsp | Dry, for subtle tang |
| Fresh Thyme 🌿 | 4 sprigs | Or 1 tbsp dried thyme |
| Fresh Rosemary 🌿 | 4 sprigs | Woodsy aroma essential |
| Unsalted Butter 🧈 | 4 tbsp | Cold, for basting |
| Apple Cider Vinegar 🍎 | ¼ cup | For tenderizing |
| Brown Sugar 🍚 | 2 tbsp | Light, for caramelization |
| Yellow Onion 🧅 | 1 whole | Quartered, for braising |
| Carrots 🥕 | 4 whole | Cut into chunks |
| Fresh Bay Leaves 🍃 | 2 whole | Dried works in pinch |
The pork shoulder is non-negotiable—center-cut, bone-in with that fat cap is what delivers the magic. Look for USDA Choice or Prime at Costco or your butcher shop, where they can help you find a well-marbled cut. I always ask for a 6-pound roast—big enough for a crowd but not so large it becomes unwieldy. The dry brine starts 24 hours ahead: pat the pork dry, then generously coat with Diamond Crystal kosher salt (it dissolves better than table salt). Trust me on this—no skipping the brining—it's what makes the meat tender and flavorful to the core.
No smoked paprika? Substitute with 1 tbsp regular paprika plus 1 tsp liquid smoke—it's a game-changer for that smoky depth. Fresh thyme and rosemary are ideal, but dried works at one-third the amount if you're in a pinch. The apple cider vinegar might seem odd, but it tenderizes the meat while adding subtle tang. For the butter, use European-style if you can find it—higher fat content means richer flavor when basting. The brown sugar isn't just for sweetness; it helps create that caramelized crust that's the hallmark of a perfect roast. And if you're short on time, pre-chop the onions and carrots while the pork brines.
This roast is a make-ahead marvel—the flavor actually improves after resting. Store the brined pork in the fridge uncovered on a wire rack for 24 hours to dry the surface (critical for crust formation). Once cooked, it keeps for 4-5 days in the fridge, but freeze portions for up to 3 months if you're planning ahead. I always make a double batch—one for dinner, one for sandwiches the next day. The leftovers reheat beautifully; just add a splash of broth and warm through gently. For serving, slice against the grain for those perfectly tender shreds—every bite should be effortless.
Why You'll Love This Recipe
- Foolproof Prep: I swear by this method—just rub the pork with salt, peppercorns, and smoked paprika, then toss it in the oven. No fancy marinades, no stressing over timing. Honestly, I’ve even done it while watching a movie.
- Smoky Magic: That bone-in pork shoulder? It’s the star, but the smoked paprika and garlic powder turn it into something ridiculously good. The crust gets crispy, the meat stays juicy, and the flavor? It lingers like a good memory.
- Leftovers Heaven: Between us, this recipe makes enough for dinner and lunch the next day. I freeze portions for lazy nights, and the slow-roasted flavor only gets better after reheating. (Yes, even on a Tuesday night.)
- Budget Crowd-Pleaser: A bone-in pork shoulder stretches across multiple meals without breaking the bank. I’ve fed six people for under $20, and everyone—even my picky teenager—comes back for seconds. Not the prettiest, but the taste makes up for it.
Step-by-step instructions for slow-braised pork shoulder roast
This isn't your average pork shoulder—we're crafting melt-in-your-mouth perfection with a deep, caramelized crust and juices so abundant they'll make your guests swoon.
👨🍳 Step 1: Create the Ultimate Dry Brine
Pat the 6 lb Bone-In Pork Shoulder completely dry with paper towels—this is non-negotiable for crispy bark. In a bowl, combine the 0.5 cup Kosher Salt, 2 tbsp Black Peppercorns (freshly cracked), 2 tbsp Smoked Paprika, 1 tbsp Garlic Powder, 1 tbsp Onion Powder, and 1 tsp Ground Mustard. Mix well to distribute the spices evenly.
Here's where the magic begins: Rub this mixture all over the pork shoulder, pressing firmly so it adheres to every nook and cranny. Don't skip the cavity—rub the seasoning inside too. The reason we're doing this dry brine is simple: it penetrates deeply, creating a flavor bomb that transforms bland meat into something extraordinary. Place the seasoned pork on a plate, cover with plastic wrap, and refrigerate for 12-24 hours. This step is crucial—it's what makes this the "best ever" pork shoulder you've ever tasted.
🔥 Step 2: Sear the Pork for Maximum Flavor
Remove the pork from the fridge and let it sit at room temperature for 1 hour before cooking. Preheat your oven to 300°F—we'll be using the oven for most of the cooking, but starting with a sear on the stovetop is essential. Heat a large Dutch oven over medium-high heat and add 2 tbsp of the 4 tbsp Unsalted Butter. Once the butter foams, add the pork shoulder fat-side down and sear for 8-10 minutes until deeply golden brown.
Flip the pork and sear the other side for another 8-10 minutes. The goal is to develop a deep, caramelized crust that locks in all those juices during the long cook. Once browned, remove the pork and set it aside. Here's the thing—don't rush this step. You want that crust to be dark mahogany, not just light brown. This is your flavor foundation, and it's worth the wait.
🍳 Step 3: Build the Braising Liquid
In the same Dutch oven, reduce the heat to medium and add the remaining 2 tbsp Unsalted Butter. Toss in the 1 whole Yellow Onion (cut into quarters) and 4 whole Carrots (cut into chunks). Cook for 5 minutes until the vegetables begin to soften. Add the 4 sprigs Fresh Thyme, 4 sprigs Fresh Rosemary, 2 whole Fresh Bay Leaves, 0.25 cup Apple Cider Vinegar, and 2 tbsp Brown Sugar. Stir to combine and cook for another 2 minutes until fragrant.
Pour in 2 cups of water (yes, it looks like too much, but trust me) and scrape up all those beautiful browned bits from the bottom of the pot. These bits are packed with flavor—don't let them go to waste. Return the pork shoulder to the Dutch oven, fat-side up, and bring the liquid to a gentle simmer. This is your braising liquid, and it's what will transform tough pork into something so tender it falls apart at the touch.
⏰ Step 4: Slow-Braise to Perfection
Cover the Dutch oven with a tight-fitting lid and transfer it to the preheated 300°F oven. This is where the real magic happens—low and slow is the key to tender pork. Braise for 6-7 hours, until the internal temperature reaches 195-203°F and the meat is fork-tender with no resistance. Here's what you're looking for: the meat should pull apart easily, and the juices should flow like silk when you pierce it with a fork.
About 1 hour into cooking, check the liquid level. If it's reduced too much, add ½ cup hot water to keep the pork submerged. This ensures even cooking and prevents the meat from drying out. Real talk: the first few hours might feel like forever, but that's exactly what creates the incredible texture we're after. Patience is your friend here.
🥘 Step 5: Rest and Serve with Confidence
Once the pork reaches the perfect internal temperature, remove it from the oven and transfer it to a cutting board. Tent loosely with foil and let it rest for 30-45 minutes. This resting period is non-negotiable—it allows the juices to redistribute throughout the meat, ensuring every bite is moist and flavorful. If you skip this step, you'll end up with dry, sad pork.
While the pork rests, skim any excess fat from the braising liquid and reduce it on the stovetop for 5-10 minutes until it's slightly thickened. This makes for an incredible pan sauce that ties all the flavors together. To serve, shred the pork using two forks, discarding the bone and any large pieces of fat. Spoon the pork back into the Dutch oven with the reduced braising liquid and toss to coat. Serve immediately with the pan sauce ladled over the top—each bite should be a symphony of tender meat, rich sauce, and aromatic vegetables. This isn't just pork shoulder; it's a showstopper that will have everyone begging for seconds.
Pro Tips For Making Best Ever Pork Shoulder Roast
- CRANK THE HEAT FIRST: That pork shoulder needs a screaming-hot pan to render fat fast and lock in flavor. I used to start medium—big mistake. Get it searing hot (3-4 minutes per side) until the crust darkens, or you’ll end up with greasy, bland meat instead of that perfect caramelized bark.
- SALT THE NIGHT BEFORE: Skip the last-minute salt rush. My grandmother swore by this, and she was right: Pat the pork dry, then slather it with salt (about 1 teaspoon per pound) and refrigerate uncovered for 12-24 hours. The salt breaks down the proteins, and the surface dries just enough for an unbeatable crust—no soggy skin here.
- DON’T PUNCH THE MEAT: I learned this the hard way—stabbing the pork shoulder to check doneness releases juices and turns it dry. Instead, use the "finger test": press a spot near the bone. If it’s firm but still slightly springy, it’s done. No thermometer? Fine, but resist the urge to poke like you’re testing a pie.
- USE THE FAT AS SAUCE: That rendered fat in the pan is liquid gold. After searing, pour it into a saucepan, add a splash of water, and simmer until it thickens into a glossy glaze. Toss it over the sliced pork—it makes a real difference, especially if you’re skipping the oven and finishing on the stovetop. (Yes, even if you’re impatient like me.)
Wine and beer pairings for this recipe
Southern Red Wine
My go-to pairing is a bold Southern Italian red like Chianti Classico or Sangiovese—the acidity cuts through the pork's richness while complementing its smoky, savory depth. I love Ruffino Chianti Superiore from Tuscany; its bright cherry notes and earthy undertones mirror the pork's caramelized crust. Serve slightly chilled to enhance the wine's freshness against the meat's warmth. 🍷
Malbec Magic
For a heartier option, reach for Argentinian Malbec—its velvety texture and dark fruit flavors stand up to the pork's robust seasoning. I adore Catena Zapata Malbec; its blackberry and plum notes harmonize beautifully with the smoked paprika in the rub. The wine's slight tannins also help cleanse your palate between bites of the tender, fall-apart meat.
Craft Beer Pairings
If wine isn't your thing, try a smoky, malty stout like Founders Kentucky Breakfast Stout. The coffee and chocolate notes in this beer create an unexpected but delicious contrast to the pork's savory-sweet profile. For something lighter, a Belgian Dubbel like Westmalle Trappist offers caramel and spice that echo the pork's braising liquid. 🍺
Local Southern Options
Back home in Georgia, I'd pair this with a local Georgia wine like Sapphire Wine Cellars' Cabernet Sauvignon. Its ripe black fruit and subtle oak notes work perfectly with the pork's caramelized crust. For beer lovers, Atlanta's SweetWater 420 IPA adds a citrusy brightness that cuts through the richness—just don't overpower the dish with too much hop bitterness.
Dessert Wine Finish
Save a glass of Portuguese Ruby Port for after dinner—its sweet, fruity notes provide a perfect palate cleanser and complement the pork's lingering smokiness. I like Graham's Six Grapes; its rich, velvety texture makes it an ideal closer to this hearty meal. A small glass (just 2-3 ounces) is all you need to tie the whole experience together.
Nutrition facts
Frequently asked questions
Why does this recipe call for a 24-hour dry brine?
The dry brine is the secret weapon that creates restaurant-quality tenderness from home. When you salt the pork 24 hours ahead, the kosher salt penetrates deep into the muscle fibers, breaking down proteins and drawing out moisture—then reabsorbing it with flavor. This process transforms tough meat into fall-apart perfection while keeping it juicy. Skipping this step means you'll miss that magical texture that makes this the \"best ever\" pork shoulder.
Can I use boneless pork shoulder instead of bone-in?
You can, but you'll miss out on some key benefits. Bone-in pork stays juicier during long cooking because the bone acts as a heat sink, keeping the meat moist. Plus, the bone adds wonderful flavor to the braising liquid. If you must use boneless, look for a well-marbled cut and consider adding a 1-inch thick slice of pork belly to the Dutch oven for extra richness. The cooking time may also be slightly shorter—watch for 203°F internal temp instead of relying solely on time.
What's the deal with the apple cider vinegar in the braising liquid?
The vinegar serves two crucial purposes: it tenderizes the meat by breaking down collagen fibers, and it adds a subtle tang that balances the richness. Don't skip it! Use apple cider vinegar specifically—white vinegar works in a pinch, but the fruity notes complement the pork beautifully. For extra depth, add 1 tsp of fish sauce to the braising liquid (it adds umami without overpowering). The vinegar also helps create that perfect balance of sweet, smoky, and tangy flavors in every bite.
How do I know when the pork is done without a meat thermometer?
If you don't have a thermometer, use the fork test: insert a fork into the thickest part of the meat—if it slides in like butter and the meat pulls apart easily, it's done. The pork should also have a deep golden-brown crust and the juices should run clear (not pink). For extra confidence, check the internal temp by inserting a knife—it should feel warm but not hot to the touch. Remember, this is a low-and-slow cook, so it takes time to reach perfection.
Can I make this in a slow cooker instead of the oven?
Transfer the seared pork to a 6-quart slow cooker with all the braising ingredients. Cook on low for 8-10 hours or high for 5-6 hours, until fork-tender. The key difference is you'll need to add 1 cup of water or broth to ensure the pork stays submerged. For best results, finish with a 10-minute broil in the oven to create that caramelized crust. The texture will be slightly more tender than oven-braised, but still incredibly flavorful.