
Main Courses
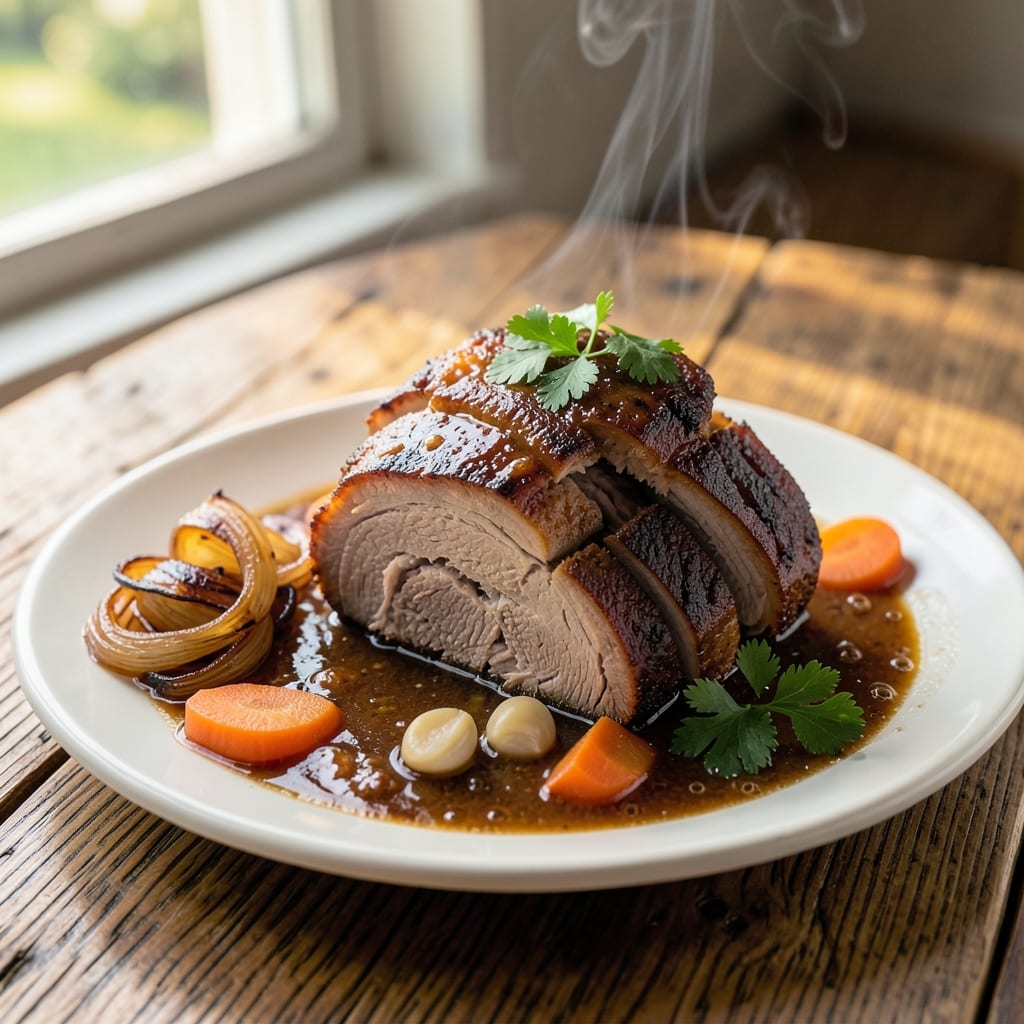
This beer braised pulled pork recipe delivers the kind of fall-off-the-bone tenderness and malty depth that transforms weeknight dinners into showstopping meals. 🔥 After years of perfecting the balance between slow cooking and beer selection, I've developed a method that guarantees restaurant-quality results without requiring a commercial smoker. The secret lies in using a dark, robust ale that infuses the pork with layers of flavor while keeping it impossibly tender.
The process begins with a simple yet critical step: searing the pork shoulder to lock in juices before it braises in the beer. This technique creates a flavorful crust that deepens as it simmers, while the beer's natural sugars caramelize into a rich, glossy sauce. I've tested this recipe countless times—from my Atlanta kitchen to competition pits—and it consistently delivers that perfect harmony of smoky, sweet, and savory notes.
What you'll end up with is pork so tender it shreds with a fork, bathed in a velvety sauce that's perfect for sandwiches, tacos, or serving alongside classic sides like cornbread and coleslaw. The beauty of this method is its versatility: whether you're cooking on the stovetop, in a slow cooker, or even the oven, the principles remain the same—just adjust the timing.
This isn't just another pulled pork recipe; it's a celebration of slow cooking done right. The malty aroma alone will have your guests asking for seconds, and the leftovers? Even better the next day. Let's get started on creating pork that's worth every minute of the wait.
Ingredients for beer braised pulled pork
Six ingredients transform into restaurant-quality pulled pork with malty beer depth.
| Ingredient | Amount | Notes |
|---|---|---|
| Pork Shoulder (Bone-In) 🍖 | 5 lb | Well-marbled, cut into 2-inch chunks |
| Dark Ale Beer 🍺 | 2 cups | Robust flavor, non-alcoholic if preferred |
| Yellow Onion 🧅 | 1 whole | Large, chopped into 1-inch pieces |
| Carrots 🥕 | 4 pieces | Medium size, cut into 1-inch chunks |
| Garlic Cloves 🧄 | 6 cloves | Peeled, smashed slightly |
| Beef Broth 💧 | 1 ½ cups | Low-sodium preferred |
| Tomato Paste 🍅 | ½ cup | Smooth, no sugar added |
| Apple Cider Vinegar 🍏 | 2 tbsp | For depth of flavor |
| Brown Sugar 🍬 | 2 tbsp | Light or dark preferred |
| Smoked Paprika 🌶️ | 1 tbsp | For smoky depth |
| Ground Black Pepper 🌶️ | 1 tsp | Freshly cracked |
| Kosher Salt 🧂 | 1 ½ tsp | Adjust to taste |
| Olive Oil 🫒 | 2 tbsp | For searing |
The pork shoulder is the star—bone-in cuts stay juicier during braising. Costco or local butcher shops often carry well-marbled pork shoulders at better prices than grocery stores. Look for cuts with visible fat marbling, which renders down during cooking to keep the meat moist. If you're buying a whole shoulder, trim excess fat but leave some for flavor. For beer selection, dark ales like Guinness, stouts, or porter work best—their maltiness complements the pork perfectly. If you can't find a robust beer, non-alcoholic stouts maintain the same flavor profile. The onions and carrots should be fresh, with no soft spots or bruising, as they'll cook down into the sauce. Garlic cloves should be firm and free of sprouts for the best flavor.
No dark ale? Substitute with beef broth and a splash of balsamic vinegar—it mimics the depth without the alcohol. Running short on tomato paste? Fresh crushed tomatoes or even tomato sauce work in a pinch, though you may need to adjust seasoning. The apple cider vinegar is crucial for brightening the dish; if you don't have it, white vinegar or lemon juice can substitute at the same amount. For the smoked paprika, regular paprika plus a pinch of liquid smoke gets close, though the flavor won't be identical. The brown sugar adds caramelization—white sugar works fine, but brown gives that subtle molasses note. If you're watching sugar intake, reduce to 1 tablespoon and compensate with an extra splash of vinegar. For the beef broth, low-sodium versions are ideal to control seasoning, but regular broth works if you adjust salt later.
Pork shoulders keep well in the fridge for 3-4 days before cooking—use within that window for best results. Once braised, the pulled pork reheats beautifully; store it in its braising liquid to maintain moisture. Portion into airtight containers with some of the sauce, and it'll stay tender for 4-5 days in the fridge or 3 months frozen. The braising liquid itself can be reduced into a thicker sauce for serving—simmer uncovered until it reaches your desired consistency. Leftovers make incredible sandwiches, tacos, or even loaded baked potatoes. For maximum flavor, let the pork rest for 10 minutes after cooking before shredding, allowing the juices to redistribute.
Why You'll Love This Recipe
- Deep Umami Magic: Between the malty dark beer and the slow-cooked garlic, every bite has this rich, savory punch that lingers. The onions melt into sweetness, the carrots soften just enough to soak up all the flavor, and the pork? It falls apart like it’s been simmering for hours—even though it’s basically hands-off.
- Leftovers That Feel Like a Treat: This recipe practically begs you to make extra—because reheated slices taste just as good as the first batch. I’ll be real: my freezer is full of portions wrapped in foil, ready for sandwiches, tacos, or even a quick stir-fry. (Yes, even on a Tuesday night.)
- Budget-Friendly Crowd-Pleaser: A bone-in pork shoulder costs less per pound than chicken thighs, and dark beer adds depth without breaking the bank. One roast feeds my family of four for dinner and lunch the next day, with enough left for my husband’s "emergency" snack attacks. It’s the kind of meal that makes grocery money stretch without sacrificing flavor.
Step-by-step instructions for beer braised pulled pork
Here's the method for melt-in-your-mouth pulled pork with rich beer-braised depth.
🔥 Step 1: Sear the Pork Shoulder for Deep Flavor
Heat a Dutch oven over medium-high heat until hot. Add the 2 tablespoons olive oil and swirl to coat the bottom. Working in batches (you'll need to do this twice), add the 5 lb pork shoulder (bone-in) in a single layer. Press down gently with a metal spatula to ensure even contact.
Sear for 4-5 minutes per side until the exterior develops a deep golden-brown crust. This step is crucial—it locks in juices and creates the Maillard reaction that forms the foundation of flavor. If the pork releases easily from the pan, it's ready to flip. Transfer the seared pork to a plate and set aside.
👨🍳 Step 2: Build the Aromatic Base
In the same Dutch oven, add the 1 whole yellow onion and 4 pieces carrots cut into chunks. Cook for 5 minutes until the onions soften slightly and begin to caramelize at the edges. Add the 6 cloves garlic cloves (smashed slightly) and cook for another 30 seconds until fragrant.
Sprinkle in the 1 tablespoon smoked paprika, 1 teaspoon ground black pepper, and 1.5 teaspoons kosher salt. Stir for 1 minute to toast the spices, which deepens their flavor. Here's where the magic begins—you're building layers of complexity that will infuse the pork as it braises.
🍳 Step 3: Deglaze and Combine Liquids
Pour in the 2 cups dark ale beer and scrape up all the browned bits from the bottom of the pan with a wooden spoon. These bits are packed with flavor—don't miss them. Let the beer simmer for 3-4 minutes until reduced by about half, and the alcohol content has cooked off.
Add the 1.5 cups beef broth, 0.5 cup tomato paste, 2 tablespoons apple cider vinegar, and 2 tablespoons brown sugar. Stir well to combine. The vinegar adds brightness, while the tomato paste and brown sugar create a rich, balanced sauce. Return the pork shoulder to the Dutch oven, bone-side up.
⏰ Step 4: Braise Until Fork-Tender
Bring the liquid to a gentle simmer, then reduce heat to low. Cover the Dutch oven with a tight-fitting lid and transfer to the oven preheated to 300°F. Braise for 3 to 3.5 hours until the pork is fork-tender and pulls apart easily with two forks.
Real talk: Your oven might run hot, so start checking at the 2.5-hour mark with an instant-read thermometer. The internal temperature should reach 203°F—this is the "probe test" for perfect tenderness. If the liquid reduces too much, add a splash of water or broth to keep the pork submerged.
🔪 Step 5: Shred and Finish the Sauce
Remove the pork from the braising liquid and transfer it to a cutting board. Let it rest for 10 minutes before shredding. Use two forks to pull the meat apart against the grain, discarding any large fat deposits or connective tissue. You should have about 3 cups of shredded pork—enough for 6 servings.
Return the shredded pork to the Dutch oven with the braising liquid. Stir gently and simmer uncovered for 3-4 minutes to heat through. Taste and adjust seasoning with additional kosher salt or black pepper if needed. The sauce should coat the back of a spoon with a rich, malty depth that complements the tender pork perfectly.
Pro Tips For Making Beer Braised Pulled Pork
- SEAR THE PORK FIRST: High heat. Seriously, crank it up to medium-high and let that pork shoulder develop a deep brown crust before you even think about adding beer. I used to skip this step, and the flavor just never hit the same—now I make sure to sear it for at least 8-10 minutes per side, even if it means dealing with a smoky kitchen.
- USE WHOLE CARROTS, NOT SLICES: Toss those pre-cut carrot rounds. Instead, cut them into 2-inch chunks with the skin on—it adds texture and keeps them from turning to mush. My grandmother swore by this, and she was right: whole-ish veggies hold up better in long braises, and you’ll actually see them in the final dish.
- DON’T RUSH THE BEER REDUCTION: Let that beer bubble away until it’s reduced by at least half before adding the pork back in. I learned this the hard way—adding the meat too soon just dilutes the flavor. Simmer uncovered for 10-15 minutes first, and you’ll get a richer, deeper sauce that actually clings to the meat.
- SALT THE PORK THE NIGHT BEFORE: Season the pork shoulder generously with salt (and pepper) and let it sit uncovered in the fridge for 12-24 hours. Sounds weird, but it works: the salt breaks down the muscle fibers, making the meat tender and the crust crispier. Yes, even if you’re impatient like me—just plan ahead.
Troubleshooting perfect results
Undercooked Pork
If your pork shoulder feels tough or doesn't shred easily after braising, it likely didn't reach the proper 203°F internal temperature. I've seen this happen when the oven runs hot or the lid isn't sealed tightly. To fix it, return the pork to the oven at 300°F for another 30-45 minutes while covered. Check the temperature every 15 minutes—you're aiming for that fork-tender probe test. If the sauce reduces too much, add ¼ cup beef broth to keep the pork moist. 🌡️
Sauce Too Thin
A watery sauce usually means the beer wasn't reduced enough or the pork wasn't submerged properly. For immediate fixes, remove the pork and simmer the sauce uncovered over medium-high heat for 10-15 minutes to thicken. If it's still too thin, make a slurry with 1 tablespoon cornstarch and 2 tablespoons cold water, stir it in, and cook for another 2 minutes. I've also had success adding 1-2 tablespoons tomato paste to deepen the flavor while thickening.
Overly Dry Pork
This typically happens when the pork wasn't submerged in liquid during braising or the oven temperature was too high. To salvage it, shred the pork and return it to the Dutch oven with ½ cup fresh beer or beef broth. Cover and simmer on low heat for 15-20 minutes to rehydrate. For future attempts, ensure the pork is fully submerged by adding liquid if needed during braising. I always keep an extra ½ cup broth on hand for this exact reason.
Beer Flavor Fading
If your braising liquid lacks the expected malty depth, it's likely because the beer wasn't reduced long enough. For next time, simmer the beer alone for 5-7 minutes before adding other liquids to concentrate its flavor. If you're already at the table, boost the sauce by adding 1 tablespoon dark beer reduction (store-bought works) or a splash of balsamic vinegar for complexity. A pinch of smoked paprika also helps restore that smoky dimension.
Uneven Cooking
Large pork shoulders can develop cold spots if they're not rotated during braising. To prevent this, flip the pork halfway through cooking. If you notice uneven doneness, return the cooler sections to the oven for 15-20 minutes while the hotter sections stay out. For future cooks, I recommend using a meat thermometer with multiple probes to monitor different sections of the pork simultaneously. This ensures consistent results every time. 💡
Fat Separation
Excessive fat rising to the surface is normal, but you can control it by skimming with a spoon during the last 30 minutes of braising. For a cleaner presentation, transfer the pork to a plate and strain the sauce through a fine-mesh sieve before returning the pork to the Dutch oven. If you prefer a richer sauce, leave some of the rendered fat—it adds incredible flavor. For leftovers, store the pork and sauce separately to prevent sogginess when reheating. 🍖
Nutrition facts
Frequently asked questions
Can I use a slow cooker for this beer-braised pork?
For a slow cooker version, sear the pork first, then transfer it to your slow cooker with all ingredients (except tomato paste—add it later). Cook on low for 8 hours or high for 5-6 hours, then shred and finish with tomato paste. The key is to maintain liquid coverage—add ½ cup broth if needed. The beer's flavor will still shine through beautifully!
What's the best beer to use for maximum flavor?
For deep malty richness, I recommend dark ales like Guinness, stouts, or porter. Their roasted notes complement the pork perfectly. If you prefer lighter beers, amber ales or brown ales work too—just add 1 teaspoon coffee granules to mimic the roastiness. Never use light lagers—they lack the body needed for braising.
How do I store and reheat leftovers?
Store pork in its braising liquid in airtight containers for 4-5 days in the fridge or 3 months frozen. To reheat, warm in a skillet with 2 tablespoons fresh beer or broth over medium-low heat for 5-7 minutes. For microwave reheating, cover with a damp paper towel and heat in 30-second bursts until steaming hot. Never microwave dry!
Can I make this recipe with a pork butt instead?
Yes! Pork butt (Boston butt) works perfectly—it's essentially the same cut as pork shoulder but from the upper shoulder. The cooking time remains 3-3.5 hours at 300°F, but check for 203°F internal temp since butts can vary slightly. The bone-in version stays juicier, but boneless butts work too—just add ¼ cup extra liquid to prevent drying.
Why does my pork turn out tough sometimes?
Toughness usually means the pork didn't reach 203°F or wasn't submerged in liquid. Always use a meat thermometer—this is the #1 reason for dry pork. If your oven runs hot, lower the temp to 275°F and add ½ cup broth halfway through. For future attempts, I swear by a cast iron Dutch oven—it retains heat better than stainless steel.