
Main Courses
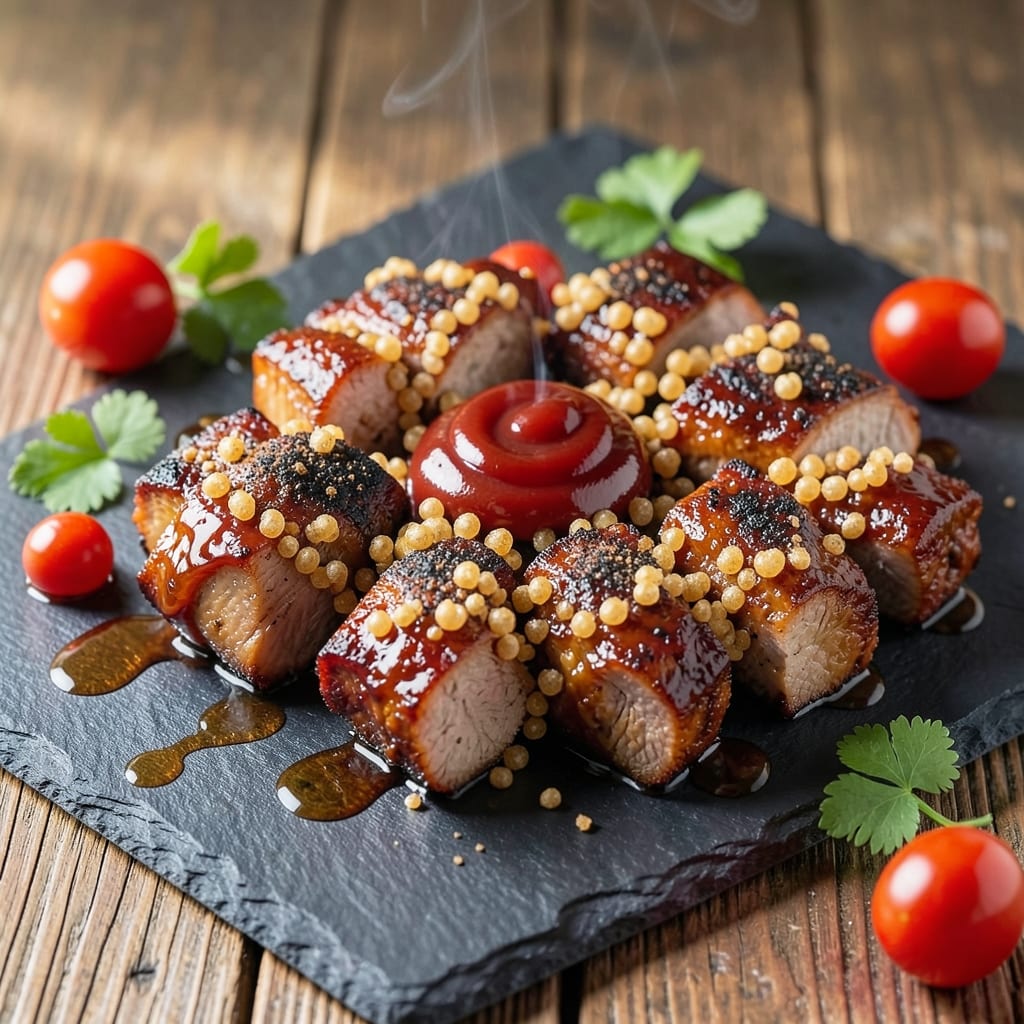
This smoky-sweet BBQ pork bites recipe transforms simple pork tenderloin into irresistible finger food that disappears faster than you can say "second round." 🔥 I perfected this technique after years of testing—where the right balance of tender meat, sticky glaze, and crispy edges turns a weeknight dinner into a crowd-pleasing sensation. The secret lies in marinating overnight and cooking just long enough to render fat without drying out the meat.
What makes these pork bites special is their versatility—they work equally well on the grill, in the oven, or even air-fried. The marinade, a blend of brown sugar, smoked paprika, and apple cider vinegar, creates a caramelized crust while keeping the interior juicy. I’ve tested this recipe with different cuts, but pork tenderloin delivers the most consistent results, especially when sliced into bite-sized pieces for easy serving.
By the time you’re done, you’ll have golden, sticky, finger-licking bites that pair perfectly with cool ranch, tangy coleslaw, or a side of cornbread. The sauce clings to every piece, making them impossible to resist—ideal for game day, potlucks, or when you want restaurant-quality appetizers without the fuss. These bites are foolproof, restaurant-quality, and guaranteed to leave your guests asking for the recipe.
Serve them warm with toothpicks for easy handling, or let them cool slightly for a firmer texture. The leftovers reheat beautifully, making them perfect for meal prep or last-minute gatherings. Let’s get cooking—these bites are the ultimate crowd-pleaser!
Ingredients for bbq pork bites
Pork tenderloin, smoky marinade, and a touch of sweetness—these ingredients create irresistible bites that vanish at parties.
| Ingredient | Amount | Notes |
|---|---|---|
| Pork Tenderloin 🐷 | 1 ½ lb | Center-cut, trimmed of fat |
| Brown Sugar 🍚 | ½ cup | Packed, light or dark |
| Smoked Paprika 🌶️ | 2 tbsp | High-quality for smoky flavor |
| Apple Cider Vinegar 🍎 | ¼ cup | Bottled or homemade |
| Ketchup 🍅 | ¼ cup | Unsweetened preferred |
| Worcestershire Sauce 🍶 | 1 tbsp | Vegan if needed |
| Garlic Cloves 🧄 | 4 cloves | Minced for marinade |
| Olive Oil 🫒 | 2 tbsp | Extra-virgin for richness |
| Salt 🧂 | 1 ½ tsp | Diamond Crystal preferred |
| Black Pepper 🌶️ | 1 tsp | Freshly ground |
| Honey 🍯 | 1 tbsp | For glaze stickiness |
| Cornstarch 🌾 | 1 tbsp | For crispy coating |
The pork tenderloin is your star player here. Look for center-cut pieces with good marbling—Costco or Whole Foods carry the best quality, but any reputable grocery store will have it. Trim off any visible fat before slicing into even 1-inch pieces (about 16-20 total). The smaller and uniform the pieces, the more consistent the cooking time. I always buy extra—these disappear fast, and leftovers reheat beautifully. For the smoked paprika, Penzeys or the bulk bins at Trader Joe's are my go-tos—they’ve got that deep, authentic smoke flavor that makes all the difference.
No apple cider vinegar? White vinegar or balsamic works in a pinch, though the flavor will be slightly different. The ketchup can be swapped for tomato paste (thinned with water) if you want to control the sweetness better. For a vegan version, use vegan Worcestershire—the regular kind contains anchovies. The honey is crucial for that caramelized crust, but if you’re avoiding it, maple syrup does the trick. Pro tip: Toast the cornstarch in a dry pan for 30 seconds before using—it adds a subtle crispiness that takes these bites to the next level. And yes, you can use pre-minced garlic from a jar, but fresh is always better if you’ve got it.
Marinate the pork overnight for maximum flavor—4-5 days in the fridge is fine, but don’t exceed a week. The marinade keeps well in a sealed container for 1 week in the fridge, so make extra if you’re hosting. For the glaze, store it separately and mix it just before cooking—it thickens when chilled. These bites reheat beautifully in a 350°F oven for 10-15 minutes—perfect for meal prep. Freeze cooked bites on a tray first, then transfer to a bag for 3 months—they’re great for last-minute gatherings or game day.
Why You'll Love This Recipe
- Foolproof Prep: The pork tenderloin slices are quick to cut—no fancy knife work needed—and the marinade (just brown sugar, smoked paprika, and apple cider vinegar) does the heavy lifting while you sip coffee.
- Sweet-Smoky Magic: That brown sugar caramelizes into a sticky glaze, while the smoked paprika adds depth. Honestly, the first bite makes you wonder why you’ve never done this before.
- Party or Pantry: These bite-sized morsels work as finger food for game day or packed in containers for lunch. (Yes, even on a Tuesday night.) The ketchup in the marinade keeps them tender enough to eat cold.
- Leftovers? More Like Leftovers: A single pork tenderloin stretches to feed four, and the flavor only gets better reheated. Between us, I’ve had them cold, warm, and straight from the fridge—all equally satisfying.
Step-by-step instructions for smoky-sweet BBQ pork bites
Here's how to transform tender pork into irresistible, crispy bites with a perfect balance of smoky-sweet flavor.
👨🍳 Step 1: Create the Glazing Sauce
In a medium saucepan, combine the 0.5 cup brown sugar, 0.25 cup apple cider vinegar, 0.25 cup ketchup, 1 tbsp Worcestershire sauce, 1 tbsp honey, and 4 minced garlic cloves. Bring to a gentle simmer over medium heat, then reduce to low heat and let it cook for 10-12 minutes until slightly thickened.
Here's the thing—you want that sauce to reduce just enough to coat the back of a spoon but still remain pourable. Stir occasionally and taste as you go. If it thickens too quickly, add 1-2 tablespoons of water to maintain the right consistency. The aroma alone will make your mouth water, but trust me, the flavor gets even better once it's been reduced.
🍳 Step 2: Prep and Sear the Pork
While the sauce simmers, trim the 1.5 lb pork tenderloin into 1-inch cubes (about 16-20 pieces). Pat them completely dry with paper towels—this is critical for achieving that perfect crispy exterior. In a large skillet, heat 2 tbsp olive oil over medium-high heat until shimmering.
Working in batches to avoid crowding, sear the pork cubes for 2-3 minutes per side until they develop a deep golden brown crust. You'll know they're ready when they release easily from the pan. Transfer the seared pork to a plate and set aside. Don't walk away—this is where the magic happens, and those browned bits are pure flavor.
🥘 Step 3: Build the Crispy Cornstarch Coating
In a shallow bowl, combine 1 tbsp cornstarch, 1.5 tsp salt, and 1 tsp black pepper. This is your secret weapon for that irresistible crunch. Toss each piece of seared pork in the cornstarch mixture, pressing gently to ensure full coverage. The cornstarch will absorb any remaining moisture, creating a perfect barrier for that crispy texture.
I like to do this in two stages—first toss them lightly, then give them a second toss to make sure every angle is coated. If you're feeling fancy, you can even use a fine-mesh strainer to shake off any excess. This step makes all the difference between good pork bites and show-stopping ones.
🔥 Step 4: Glaze and Finish Under the Broiler
Return the coated pork to the skillet and pour the reduced sauce over the top. Stir gently to coat all the pieces, then transfer the skillet to the broiler. Broil for 3-5 minutes until the sauce bubbles and the pork develops a glossy, caramelized finish. Watch closely—you want it to be golden, not burnt.
Here's where it gets fun—toss the pork bites on a baking sheet and broil for another 1-2 minutes to crisp up the cornstarch coating even more. The high heat will create that perfect contrast of crispy outside and tender inside. If you don't have a broiler, you can finish them in the oven at 450°F for 5-7 minutes, but the broiler gives you that restaurant-quality finish.
⏰ Step 5: Rest and Serve
Let the pork bites rest for 5 minutes before serving. This might seem counterintuitive, but it allows the juices to redistribute, ensuring each bite is juicy and flavorful. Arrange them on a platter and drizzle with any remaining sauce from the skillet. Garnish with a sprinkle of smoked paprika for that extra smoky kick.
Serve immediately with toothpicks for easy grabbing—these disappear faster than you can say "second helping." The combination of sweet, smoky, and tangy flavors with that perfect crunch makes them ideal for game day, parties, or just a weeknight snack. Trust me, once you try these, they'll become a regular in your recipe rotation.
Pro Tips For Making Bbq Pork Bites
- Trim the Fat First: Pork tenderloin’s lean, but that outer fat layer is where flavor hides. Use kitchen shears to snip it off—just leave a thin layer, or the bites will dry out faster than a summer picnic. ---
- Brown Sugar Sticks: Don’t just dump it in. Mix the brown sugar with smoked paprika and a splash of apple cider vinegar first—let it sit 10 minutes. The sugar caramelizes slightly, giving your bites that sticky, smoky glaze instead of clumping like sad oatmeal. ---
- Don’t Overcrowd the Pan: I learned this the hard way—piling bites too high steams them into mush. Cook in batches if needed, even if it means an extra minute. A crowded pan turns crispy into soggy, and nobody’s eating that. ---
- Vinegar Last: Add the apple cider vinegar right before serving, not during cooking. It’s sharp enough to cut through the sweetness, but too early and it’ll turn your glaze into a sad, thin sauce. Save it for that final drizzle—trust me, it makes a difference.
Common mistakes when making this dish
Skipping the Marinade
Don’t rush the marinating process—this is where the magic happens! I’ve seen folks skip it or only marinate for a few hours, and the results are noticeably less flavorful. The apple cider vinegar and smoked paprika need time (at least 4-6 hours, overnight is best) to penetrate the meat and create that deep, smoky-sweet flavor. Trust me, the extra time pays off with bites that burst with flavor, not just salt and sugar. 🌶️
Uneven Slicing
Consistency is key when slicing the pork tenderloin! I’ve seen too many recipes where the pieces are all different sizes, leading to some bites being undercooked while others are dry. Use a sharp chef’s knife and cut the tenderloin into 1-inch cubes—about 16-20 pieces total. Uniform size ensures even cooking and that perfect crispy exterior every time. Grab a kitchen scale if you’re unsure—precision matters here!
Overcrowding the Pan
This is a rookie mistake that kills crispiness! When searing the pork, working in batches is non-negotiable. A crowded pan steams the meat instead of browning it, leading to soggy bites instead of the crispy, caramelized perfection you’re after. Use a large skillet and cook in small batches—about 6-8 pieces at a time. Your patience will be rewarded with golden, crunchy bites that’ll have everyone reaching for seconds. 🔥
Skipping the Rest
I know, I know—you’re eager to dig in! But skipping the 5-minute rest is a big mistake. Those juices need time to redistribute after cooking, or you’ll end up with dry, flavorless bites. Trust the process! Let them rest on a plate or platter while you finish any last touches, like drizzling extra sauce or garnishing with smoked paprika. It’s worth the wait for that juicy, restaurant-quality result. ⏰
Ignoring the Cornstarch
The cornstarch coating is your secret weapon for that irresistible crunch, so don’t skip it! Some folks might think it’s optional, but it’s what gives these bites that perfect texture contrast—tender inside, crispy outside. Toss the seared pork in the cornstarch mixture twice for full coverage, and don’t forget to toast it lightly in a dry pan first. It’s a small step that makes a huge difference in the final result. 💫
Broiling Too Long
Watch those pork bites like a hawk when broiling—they can go from perfect to burnt in seconds! You want that sauce to bubble and caramelize, but you don’t want the pork to turn into charcoal. Aim for 3-5 minutes total, tossing them occasionally for even browning. If you’re unsure, start with 3 minutes and check frequently. The goal is a glossy, golden finish, not a crispy black one. 🌟
Nutrition facts
Frequently asked questions
Can I make these pork bites with a different cut of pork?
Pork tenderloin works best for its tenderness, but you can try boneless pork chops or pork shoulder cut into 1-inch cubes. If using shoulder, trim excess fat and marinate for 24 hours to tenderize. For chops, slice against the grain for maximum tenderness. Avoid fatty cuts like ribs—they won't crisp as well.
How do I keep these bites crispy when reheating?
Reheat in a 400°F oven for 8-10 minutes on a wire rack (not directly on the tray) to maintain crispiness. For air fryer reheating, use 375°F for 3-4 minutes—shake halfway. Avoid microwave—it makes them soggy. The cornstarch coating helps preserve crunch, but oven reheating works best.
What's the best way to serve these pork bites?
Serve warm with toothpicks for easy grabbing! Pair with cool ranch dip, tangy coleslaw, or cornbread muffins to balance the smoky-sweet flavors. For a complete meal, add a simple green salad with vinaigrette. These bites also make great sliders—just add a small bun and pickles.
Can I make this recipe in an air fryer?
Skip the broiler step and cook the cornstarch-coated pork in the air fryer at 375°F for 8-10 minutes, shaking halfway. For extra crispiness, spray with oil before air frying. The air fryer gives you that perfect texture without needing a broiler, and it's great for smaller batches.
How far ahead can I prepare the marinade?
The marinade keeps well in the fridge for 1 week in a sealed container. For best flavor, marinate the pork for 4-5 days max—beyond that, the vinegar can start breaking down the meat fibers. If you're making it ahead, store the sauce separately and mix just before cooking to maintain freshness.